Tutorial: Building an internet connected lighting system
In this tutorial, you'll use the Izuma IoT Platform to build a complete connected lighting system that you can deploy in your house or office. The system consists of one (or more) extra-bright RGB LEDs hooked up to an Mbed OS development board. A motion sensor can turn the lights on and off. The lights are also connected to the internet, so you can change their color. The system uses Device Management to connect to the internet. It is secured end-to-end, and you can update it through over-the-air firmware updates.
You'll learn all the steps required to build the hardware, the cloud integration and the application. At the end of the tutorial, you'll have a firm understanding of building complete connected IoT solutions using Device Management. You'll also have a cool light.
Requirements
You need the following hardware:
-
A development board capable of connecting to Device Management. Either:
- NXP FRDM-K64F using Ethernet.
- NXP FRDM-K66F using Ethernet.
- u-blox EVK-ODIN-W2 using Ethernet or Wi-Fi.
- ST NUCLEO-F429ZI using Ethernet.
-
A breadboard to hook up the components.
-
A micro-SD card - FAT formatted.
-
A PIR sensor to detect motion.
- If you do not have a PIR sensor, you can also simulate this effect using the on-board user button.
-
An RGB LED - preferably an extra-bright one.
- For a better effect, you can also use a Grove Chainable LED or Grove LED Bar with an optional Grove Shield.
- After building the original application, you can exchange the LED for something fancier.
-
Jumper wires, both male-male and male-female.
-
Resistors: 1x 100 Ohm, 2x 220 Ohm.
-
An account to access to the Device Management Portal for your region:
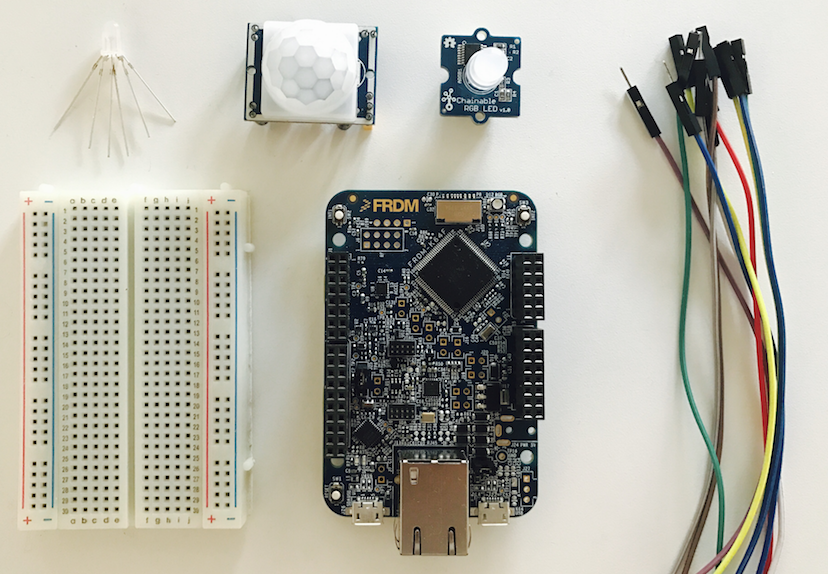 Components required to build our lighting system. Top row: RGB LED, PIR sensor, Grove Chainable LED. Bottom row: breadboard, NXP FRDM-K64F, jumper wires.